Controller
背景及说明
背景
在 Trantor 的最佳实践过程中,经过多次讨论并达成共识,提出了在 Trantor 中增加 Controller 机制,用于与前端(View)对接。
Controller 说明
在 Trantor 中,Controller 定义为与前端(View)对接的组件。
其主要特征如下:
-
不需要定义接口,也无需上报元数据
-
不支持二开,不支持 PRC 调用
-
支持多方法
使用说明
前后端接口
Controller 类似 Spring Controller 机制,前后端接口如下:
- 前端(View)配置: {业务域}/{ControllerName}/{MethodName}
- 业务域内路径:/api/trantor/logicController/{业务域}_{ControllerName}/{MethodName}
前端组件
- 当 Controller 做为数据源使用时,和 dataFlow、dataFunc 使用方法一致:
<View> <Table dataController="{业务域}/{ControllerName}/{MethodName}"> <Fields> ... </Fields> </Table></View>- 当 Controller 做为 Action 使用时,和 logicFlow、logicFunc 使用方法一致:
<Actions> <Action logicController="{业务域}/{ControllerName}/{MethodName}" label="testLogicCtrl"/></Actions>- 使用 groupCountController, 和 groupCountFlow、groupCountFunc 使用方法一致:
<View> <Table dataController="{业务域}/{ControllerName}/{MethodName}" groupCountField="status" groupCountController="{业务域}/{ControllerName}/{MethodName}"> <Fields> ... </Fields> </Table></View>- 在 ts 文件中使用
ControllertriggerLogicController,和 triggerLogicFlow、triggerLogicFunc 使用方法一致:
import { Controller, showMessage } from "nusi-sdk";
export default class extends Controller {  someAction = () => {    this.triggerLogicController("{业务域}/{ControllerName}/{MethodName}", [])      .then((res) => {        // dosomething      })      .catch((res) => {        // 异常消息提示        showMessage({          type: "Error",          message: res.message,        });      });    this.triggerLogicFunction("funcKey", [])      .then((res) => {        // dosomething      })      .catch((res) => {        // 异常消息提示        showMessage({          type: "Error",          message: res.message,        });      });
    this.triggerLogicFlow("flowKey", [])      .then((res) => {        // dosomething      })      .catch((res) => {        // 异常消息提示        showMessage({          type: "Error",          message: res.message,        });      });  };}
业务代码
假设业务域为 item, 以下前端使用的 key 为:
- item/UserController/hi
- item/UserController/noArgs
- item/UserController/multiArgs
对应后端访问路径为:
- /api/trantor/logicController/item_UserController/hi
- /api/trantor/logicController/item_UserController/noArgs
- /api/trantor/logicController/item_UserController/multiArgs
@LogicController@Slf4jpublic class UserController {
    @ControllerMethod    public User hi(User user){        log.info("hello world from hi");        return user;    }
    @ControllerMethod    public void noArgs() {        log.info("hello world from noArgs");    }
    // 注意多参数json body 格式为: [{},{}], 里边的元素按顺序与方法参数绑定    @ControllerMethod    public User multiArgs(User user, ItemBO itemBO){        log.info("hello world from multiArgs");        return user;    }
}
可以在注解上重新定义新的访问连接, 如下重新定义后为
item/rename/hello
@LogicController("rename")public class RenameController {
    @ControllerMethod("hello")    public User hi(User user){        System.out.println("hello world from RenameController.hi");        return user;    }}
注:为区别 Spring Controller 注解,Trantor 添加 LogicController 注解用以区别。
权限相关
功能权限
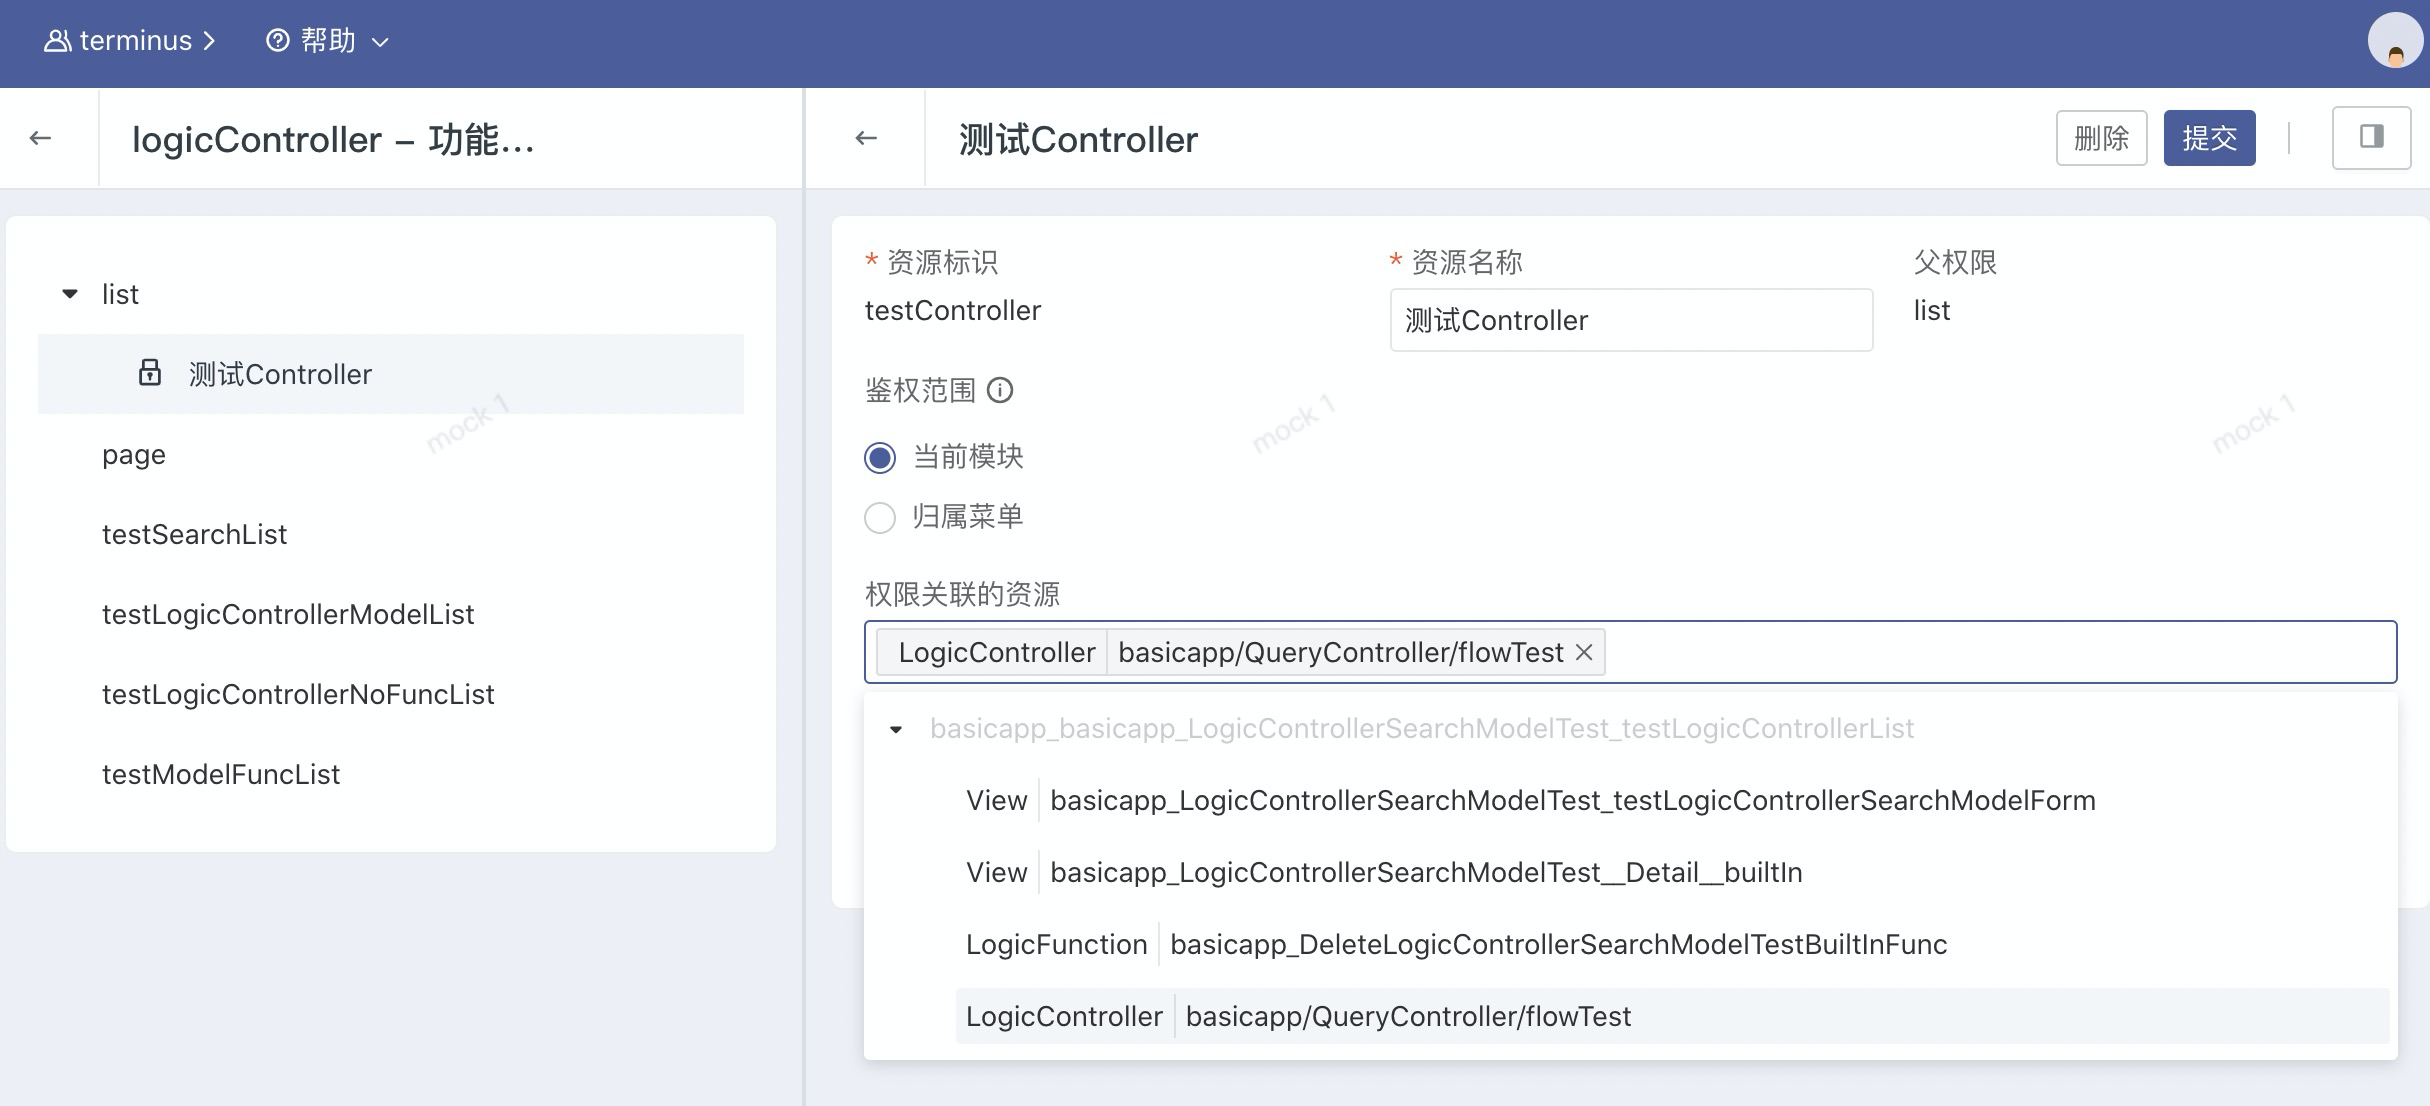
(1)配置功能权限
和页面其他类型(跳转视图、执行 Flow/Function)的按钮一样,如果页面中的按钮配置的 Controller 中的方法,也可以在研发态功能权限中对该按钮配置功能权限点。如果没有对按钮创建权限点,默认所有用户可以操作该按钮。如下图所示
(2)角色分配功能权限
进入到统一工作台角色功能权限授权页面,给用户分配 controller 按钮权限。如下图所示

(3)对用户分配角色后,验证授权生效
对用户分配了授予 Controller 按钮权限的角色后,可以查看和操作到对应的按钮,否则不能操作该按钮。

数据权限
数据权限跟 trantor 之前的用法一致,开关主要由注解控制,具体参考 https://trantor-docs.app.terminus.io/v1.x/doc/developer-guide/permission/data-permission#%E6%B3%A8%E8%A7%A3%E6%89%8B%E5%8A%A8%E5%BC%80%E5%85%B3%E9%89%B4%E6%9D%83
匿名访问
当对外暴露的接口不需要鉴权的时候,可以使用匿名访问注解 @AnonymousAccess。
该注解可放在类上,表示整个类匿名访问, 也可以放在方法上, 表示只有对应的方法开启匿名访问。
@LogicController("rename")@AnonymousAccesspublic class RenameController {
    @ControllerMethod("hello")    @AnonymousAccess    public User hi(User user){        System.out.println("hello world from RenameController.hi");        return user;    }}
localdebug
使用方式与之前无异,具体参考
https://trantor-docs.app.terminus.io/v1.x/doc/best-practice/local-debug#app
https://trantor-docs.app.terminus.io/v1.x/doc/trantor-tools/local-debug#app